Blueberry Buttermilk Scones

Our friends, Alanna and Bob, and proprietors of The Inn at Whiskey Bella Ranch shared this signature recipe with Culinary Latitudes Travel.  These scones taste traditional in every sense.  The Inn at Whiskey Bella Ranch is sharing this tasty recipe for their signature scones.  The chef is a personal friend of mine and said this recipe is the requested the most by their guests.  Enjoy! ** Note (from Alanna) - here in Colorado, the dough is very dry, so I add just a bit more buttermilk, and I dump the dough on parchment paper in order to press it into the correct shape.  Then I can use the parchment to help me roll the dough into a nice rectangle before cutting and freezing.  The parchment paper has saved my life with this recipe.

Blueberry Scones

This is a signature dish at Whiskey Bella Ranch in northern Colorado.  Guests ask for the recipe over and over again.  Enjoy!

  • 3 and 1/4 Cups Flour plus 2 Tablespoons
  • 1/2 Cup + 2 Tablespoons granulated sugar
  • 1/4 Cup brown sugar
  • 1 Tablespoon baking powder
  • 1 teaspoon baking soda
  • 1 1/4 teaspoon salt
  • 1 Cup unsalted butter
  • 3/4 Cup cold buttermilk
  • Zest of one lemmon
  • 1 1/2 C Blueberries (I freeze them overnight before I use them)
  1. Preheat oven to 350 degrees.  In a very large bowl combine the first five ingredients.  Throw in the butter and work it with your fingertips until the dough is pea and lima bean sizes.  Add the buttermilk and lemon zest and toss to combine.

    Immediately dump everything onto a clean surface with more than enough room to work the dough.  (Alanna with Whiskey Bella Ranch uses parchment paper.  It helps with shaping and cutting the scones.). Using only the heel of your palm quickly flatten the dough.  Gather the dough back into a mound two or three times and repeat.  The dough should begin holding together.  Avoid overworking the dough.  You should still see some pea size pieces of butter through it.

    Pat the dough down to about 3/4 inch, and make a 9 x 12 rectangle.  Sprinkle the frozen blueberries on top evenly and begin to roll the dough like a jelly roll with the blueberries inside.  Shape into a 12 inch long cylinder.  Lightly flatten the top and cut out 9 or 10 triangles.  Transfer to an un-greased sheet and freeze for at least 2 hours prior to baking.  Or freeze up to one month tightly wrapped.

    Remove scones from freezer and place on two un-greased baking sheets with plenty of room to breath.  Brush with an egg wash and sprinkle liberally with granulated sugar.  Bake from frozen until cooked, nicely brown, and easily lifted off pan.  About 25 minutes.


These are best when eaten the day they are made.

How To Make the Classic Blue Hawaiian

TastingNotes-BlueAnew-main-large-730x525-bluehula-comm-T10.jpg

First image...   


Blue Hawaii

  • 1 ½ ounces silver rum
  • 1 ounce blue curaçao
  • 1 ½ ounces Coco López cream of coconut
  • 1 ½ ounces fresh pineapple juice
  1. Stir ingredients over ice (or combine with crushed ice in a blender) and pour into a cocktail glass. Garnish with a pineapple wedge, maraschino cherry, and an orchid.

From the Fairmont Orchid on Hawaii’s Kohala Coast


The Spirits

Bols Blue Curaçao ($12) It’s the original blue curaçao, flavored with an intense variety of bitter orange grown on its namesake Dutch Caribbean island.

Selvarey Rum ($25) An impressive new brand from Panama with a suave vanilla nose and layered, not overly sweet flavors, sure to kick any rum cocktail up a few notches. Also try the cacao-flavored version.

Sammy’s Beach Bar Rum ($23) A minerally, fruit-packed entry from rocker (and part-time Aloha State resident) Sammy Hagar, distilled from the first pressing of virgin Maui Gold sugarcane.

Tanduay Silver Asian Rum ($20) A connoisseurs’ rum that works on its own or in cocktails. Availability is limited, but this Philippines-crafted stunner is pure and focused from start to finish, a worthy addition to a serious bar.

Caliche Puerto Rican Rum ($25) Created by nightlife impresario Rande Gerber with Puerto Rico’s Serrallés distilling family, lively Caliche is bright with complex flavors, charming rustic notes, and scuba-worthy depth.

Originally appeared in Virtuoso Life magazine, July 2014.

7 COCKTAILS TO GET YOU INTO THE HOLIDAY SPIRIT

mulled-wine_0.jpg

Article:  James Beard Foundation editors; December 11, 2017 No chestnuts roasting on an open fire? No Jack Frost nipping at your nose? No worries. Just mix up a pitcher (or two) of one of these Yuletide-evoking drinks and you and your guests will be in the holiday spirit in no time.

Mary Rockett's Milk Punch Apparently folks in the 18th century also needed a little tipple to get through the holidays. This traditional recipe, adapted by cocktail expert David Wondrich, dates back to 1711.

Mary Rockett's Milk Punch

This delightfully smooth, liqueur-like formula dates back to 1711.

David Wondrich, Adapted from Imbibe! (Perigee Trade, 2007)

  • 2 lemons
  • 1 quart V.S. or V.S.O.P. Congac
  • 1 cup sugar
  • 3 oz lemon juice
  • 1 pint whole milk
  • 1/2 whole nutmeg, freshly grated
  1. Using a vegetable peeler, peel lemons, avoiding the white pith as much as possible. Put the peels in a sealable, 2-quart glass container and pour Cognac over them. Cover and let sit for 48 hours.

    Add sugar and lemon juice to the lemon-infused Cognac. Heat whole milk until scalding hot, then add to the cognac mixture and stir until the milk curdles. Stir in the grated nutmeg and let the punch sit for 1 hour.

    Strain through fine cheesecloth or paper towels, bottle, and refrigerate. To serve, pour from chilled bottle into sherry glasses. If punch is too thick, add a little seltzer or, during winter, hot water.

Cardamom Old Fashioned A subtle riff on the classic cocktail staple, this version uses maple syrup and cardamom bitters for a warming, fragrant antidote to winter doldrums.

CARDAMOM OLD FASHIONED

A subtle riff on the classic Old Fashioned, this version uses maple syrup in lieu of standard sugar, while handmade cardamom bitters step in for the more traditional Angostura variety, creating a warm, fragrant antidote to winter doldrums.

Elena North-Kelly, Managing Editor, James Beard Foundation

  • 2 ounces rye whiskey
  • 15 to 20 drops Bob’s Cardamom Bitters
  • 1/2 teaspoon maple syrup
  • Orange twist (for garnish)
  1. Pour the first three ingredients into a cocktail shaker.
  2. Add ice and stir until thoroughly chilled.
  3. Strain the mixture into a rocks glass, over ice.
  4. Garnish with an orange twist, enjoy!

Negroni Sbagliato It's no secret that everyone loves a negroni. Pro tip: just dress up your go-to drink for the holidays with a festive splash of bubbly.

NEGRONI SBAGLIATO


"The legendary Bar Basso in Milan (which originally opened in 1933 and moved to its current space in 1947) claims provenance of this buoyant little cousin to the Negroni, whose sbagliato addendum means “mistaken” or “incorrect” in Italian. Basso’s jovial proprietor Maurizio Stocchetto entertains guests with an origin tale citing his father, Mirko—a legendary midcentury barman and the owner of Bar Basso beginning in 1967—as the “accidental” inventor of the drink in the early 1970s, substituting prosecco for gin. Most impressively, the bar serves its sbagliato in a giant handblown goblet complete with an ice block the size of a car battery." — Talia Baiocchi and Leslie Pariseau

  • 1 ounce Campari
  • 1 ounce sweet vermouth
  • 3 ounces prosecco
  • Orange half-wheel for garnish
  1. Combine the ingredients in a rocks glass over ice and garnish with the orange wheel.

Le Père-Bis Leave it to acclaimed mixologist Jim Meehan, of the Beard Award–winning PDT, to create a decidedly sophisticated hot toddy, anchored by Scotch, chamomile tea, honey, and a hint of floral St-Germain.

LE PÈRE-BIS

Jim Meehan, head bartender at the JBF Award–winning PDT, uses St-Germain to add delicate, floral undertones to this wintertime sipper.

  • 1/2 cup honey
  • 1/4 cup boiling water
  • 4 ounces brewed chamomile tea
  • 1 1/2 ounces Ardbeg 10-Year-Old Single Malt Scotch Whisky (or another intensely smoky Scotch whisky)
  • 1/2 ounce St-Germain
  • 1 lemon wedge studded with three cloves
  1. Stir together the honey and water to make a syrup. Let cool. Measure out a half ounce of syrup and combine with the tea, whisky, and St-Germain in a heat-proof mug. Stir. Garnish the hot toddy with the clove-studded lemon wedge. Refrigerate remaining syrup for another use.

Gin-Gin Mule This vibrant, ginger-spiked cocktail created by the legendary Audrey Saunders is one of the Pegu Club's signature drinks.

GIN-GIN MULE

This fresh and vibrant cocktail is one of Pegu Club’s signature drinks. By:  Audrey Saunders

  • 3/4 ounce fresh lime juice
  • 1 ounce simple syrup
  • 2 mint sprigs
  • 1 3/4 ounce Tanqueray gin
  • 1 ounce homemade ginger beer (We have used store bought ginger beer too.)
  • Lime wheel and candied ginger for garnish
  1. Add the lime juice, simple syrup, and a mint sprig to a 10-ounce highball glass. Muddle well. Add the gin, ginger beer, and ice to a cocktail shaker. Shake well and strain into the highball glass. Garnish with the remaining mint spring, lime wheel, and candied ginger. Serve with long straws.

Hot Spiced Wine As James Beard himself said, "cold-weather celebrations and holidays call for a huge punch bowl of hot spiced wine to enliven the festivities."

HOT SPICED WINE

Hot spiced wine, also known as “mulled wine,” goes by many names: glögg in Swedish, glühwein in German, vin chaud in French, and so on, and varies slightly from country to country. It is simply red wine heated with sugar and spices, and often lemon or orange rind, originally a process used to reconstitute wine that had gone bad. These days, cold-weather celebrations and holidays call for a huge punch bowl of hot spiced wine to enliven the festivities.  By:  James Beard, Author and Educator

  • 4 oranges
  • Cloves
  • Rind of 1 lemon
  • 2 bay leaves
  • 3/4 cup cognac (brandy, or bourbon)
  • 3 1/2 bottles red wine
  • 1/2 cup sugar
  1. Preheat oven to 350ºF.
  2. Stick whole cloves into oranges, making a pattern if you like. Bake the oranges for 15 to 20 minutes, or until they are heated through and the cloves begin to show a little white dust, which looks very attractive.
  3. Place oranges in a large heatproof bowl of silver or ceramic with the lemon rind and bay leaves. Heat cognac and pour it over the oranges, set it alight, and let it burn down. While it is burning, pour over the oranges about 3 bottles of good dry red wine, such as a California Pinot Noir or Cabernet Sauvignon, heated until very hot, but not boiling. Add the sugar and stir it in well. (The amount of sugar is up to you; you can sweeten to taste. I like a minimum or none at all, if the wine is good.)
  4. Stir well and serve warm in mugs or glasses with a little twist of orange peel.

French Seventy-Five Champagne, gin, and lemon juice come together for an effortlessly celebratory classic.

FRENCH SEVENTY-FIVE

What could be more fun, indulgent, and celebratory than a festive Champagne cocktail? Based on a Tom Collins, this recipe was originally published in James Beard's first book.  James Beard; author and educator

  • 1 tablespoon sugar syrup or superfine sugar
  • Juice of 1 lemon or 1 1/2 limes
  • 4 ounces gin
  • 2 ounces Champagne
  1. Combine sugar syrup, juice, and gin in a cocktail shaker. Shake well. Pour into a 12-ounce glass with plenty of ice. Top with Champagne.

Salted Whiskey Caramels

  For some reason, the holidays allow some of us to throw all dietary restrictions out the window without guilt.  You will love this diet-free candy recipe, laced with whiskey.  The creators of moonshine probably didn't have caramels in mind when concocting their firewater.  To be honest, neither did we ... but it's a nice light compliment to the sweetness of this candy and we hope you will enjoy the recipe as much as we do.  Great for gift giving!


Salted Whiskey Caramels

  • 5 tbsp butter
  • 1 cup heavy whipping cream
  • 1/4 cup Whiskey (we used Jack Daniels' Old No. 7)
  • 1 tsp vanilla
  • 1/4 tsp kosher salt
  • 1 1/2 cups sugar
  • 1/4 cup light corn syrup
  • 1/4 cup water
  • 1 tbsp kosher salt, for sprinkling
  • candy thermometer needed
  1. Line a 9-inch square pan with parchment or wax paper, allowing the paper to drape over the sides; spray lightly with cooking spray.  We make a crease in the paper so if fits neatly into the pan.

Cream Mixture

  1. In a 1-quart saucepan heat butter, whipping cream, whiskey, vanilla, and salt to boiling, watch carefully and stir frequently.  Remove from heat.

Sugar Mixture

  1. In a 3-quart saucepan mix sugar, corn syrup and water.  Heat to boiling over medium-high heat. DO NOT STIR.  Boil until sugar turns a warm golden brown.

  2. When sugar mixture is done, turn off the heat and slowly add the cream mixture to the sugar mixture.  BE CAREFUL - it will bubble up violently.  Cook over medium-low heat for about 10 minutes, until mixture reaches 248 degrees F on a candy thermometer.  Pour caramel into prepared pan; cool for 10 minutes.

    Sprinkle with 1 tablespoon kosher salt; or desired amount; and cool completely.  Cut into squares; wrap individually in wax paper.  

Our Festive Cranberry Martini

Back by popular demand ... each year we post this photo of our satisfying cranberry martini, sure to please the pickiest martini drinkers.  We find this is best served in front of festive holiday lights with your feet up and your favorite music playing in the background!

Cranberry Martini

The sugared rim makes this a nice treat while decorating for the holidays.

  • 1 jigger vodka (1.5 oz)
  • 1/2 oz orange liquor
  • 1/2 oz dry vermouth
  • 1 jiggers cranberry syrup
  • 1 cup ice
  • cranberries

Cranberry Syrup

  • 1 cup water
  • 1/2 cup sugar
  • 1 cup cranberries
  1. Rub a cut orange around the rim of your martini glass and dip the rim in fine sugar, set glass aside.  Combine vodka, orange liqueur, vermouth, cranberry syrup (see below), and ice in a cocktail shaker. Shake vigorously to chill. Pour into martini glasses, and serve. Garnish with cranberries.

Cranberry Syrup

  1. Stir water and sugar in pan until sugar begins to dissolve.  Add the cranberries and heat all ingredients over medium high until it begins to boil.  Immediately turn down to a simmer and continue to stir, making sure it does not burn.  Allow to simmer for 10 minutes and cool.  Once cool, strain with a fine mesh strainer or cheese cloth into a measuring cup.  

Perfect Dinner Party "Ingredients"

Have you ever wanted to know how to throw the perfect dinner party for your friends?  You know, a gathering of 6-12 of your favorite people to enjoy an evening of good conversation and merriment?  Some people find this to be a daunting task.  Even the best home entertainers, at times, find planning a social engagement with appetizers, drinks, dinner and dessert seems to hit a level of stress they don't usually encounter on a daily basis.  ~ Culinary Latitudes, llc Article by:  Laura Rysman of the New York Times

Food, drink, friends, good conversation — a dinner party is, in the end, a simple and enduring combination of ingredients, made unique by what hosts and guests infuse the evening with. To help you achieve a more flawless and fun-filled gathering, here are a set of guidelines with everything you need to know about throwing your best dinner party.

First, Make a Timeline

Advance planning will ultimately make a dinner party that much easier to pull off. Making accurate lists and giving yourself plenty of time for each task will minimize chaos and help you tackle the inevitable glitches that arise.

The British party planner Fiona Leahy says that as a professional, outsourcing is key for her own busy life, but even if you can’t hire a catering staff for your private affair, think about what you don’t have to do yourself — like picking up a dessert, having wine, flowers or other supplies delivered, or hiring a cleaning service for before or after the party. Keeping it simple for yourself is crucial. “I’m not above just serving a sourdough truffle pizza with great wine,” Leahy says. “It’s the company that counts … and, of course, the tablescape.” Here, her timeline tips for your party:

Two weeks before

  • Create your guest list, making sure you have enough dishes to serve everyone. (Here are some good, simple suggestions for dinnerware sets.)
  • Send out your invitations.
  • Think about the atmosphere and aesthetic you’d like for the evening. Figure out what you’ll need for décor and make a list.

One week before

  • Pin down confirmations from guests and be sure to check on their dietary restrictions.
  • Plan your menu, keeping in mind what ingredients are in season and what can be prepared a day before the party.
  • Think about how you’ll want your dishes to look when served, and be sure to include any special tools, plates or garnishes you’ll need to create.
  • Pick up candles and any other décor (except flowers) you’ll want for the evening.

Two days before

  • Pick up all the ingredients for the dinner.
  • Purchase wine and any other beverages you’ll be serving, and make sure you have a good corkscrew.
  • Fill up your ice trays and pick up extra ice from the store if you’ll be making cocktails.
  • Make a playlist (or several).

The day before

  • Prepare as much of the food as possible, including dessert.
  • Clean up your home, especially areas where guests will be (the dining room, living room and bathroom) and be sure the trash and the dishwasher are empty for the next day.
  • Pick up flowers or other natural touches and put them in vases.

The day of

  • Take it from pro chefs and prepare a mise en place, setting out all of the ingredients, sauces and garnishes you’ll need to finish your dishes around a counter area with a cutting board and good knives. Line up small bowls and fill them with everything you’ll need.
  • Prepare any last dishes.
  • Set up the table and any décor. All linens, table settings, glasses, place cards and candles should be laid out at this point.

Two hours before

  • Arrange all the food you cooked previously on the counter and pull out any potsyou’ll need to prepare them.
  • Set up a drink and snack station for guests’ arrival with wine or an aperitif and something small to nibble on.
  • Put pitchers or bottles of water on the table.
  • Get dressed for the evening.
  • Light candles and put on your first playlist.
  • Have a glass of wine or take a moment for yourself so you’re relaxed when your guests arrive.


Blackberry Sangria

This refreshing blackberry sangria is the perfect, easy cocktail to serve at an intimate gathering or for a crowd.  This make-ahead punch blends red wine, brandy, and plenty of berry fruit flavor.  Tested, tried, and loved by Culinary Latitudes!


Blackberry Sangria

This is a great drink with appetizers.  Try switching the the blackberries to raspberries for a new flavor!  If you want to skip making the blackberry simple syrup, add the 2/3 cup of sugar to the room temperature wine before adding the fruit.  Stir until completely dissolved.  

Blackberry Simple Syrup

  • 2/3 cup granulated white sugar
  • 1/3 cup water
  • 4 oz fresh blackberries, slices or slightly mushed
  • cheesecloth or mesh strainer

Sangria

  • blackberry simple syrup
  • 750 ml bottle of dry red wine (we used a cabernet savignon)
  • 1/2 cup brandy (no need for expensive brands)
  • 24 oz ginger ale
  • 1 slice lime (thin slices)
  • 2 medium oranges (or 1 extra large orange)
  • 6 oz blackberries
  • ice

Simple Syrup

  1. In a small saucepan, add water and sugar.  Allow to boil for 2-3 minutes, until sugar is dissolved and the water is clear.  Add in blackberries and simmer for about 10 minutes or until the berries are mushy.  Transfer to the cheesecloth and squeeze all of the juice into a small bowl.  If using a mesh strainer, press down to get most of the juice.  Allow to cool completely before using in the sangria.

Sangria

  1. In a pitcher add the wine, brandy, blackberry simple syrup, and all the fruit.  Allow to sit overnight in the fridge to fully infuse the fruit flavors into the punch.  Add the ginger ale and ice just before serving.


Spice Up Your Chocolate Chip Cookies

With December right around the corner, we're gearing up for the official start to the holiday baking season with a batch of these vanilla spice cookies from Amanda Hesser, co-founder of JBF Award–winning website Food52. Inspiration for this delightful (and vegan!) recipe came from Hesser's desire to merge the benefits of a chewy chocolate chip cookie with the fragrance of a holiday spice cookie.


Ain't Your Momma's Pasta

You will love this easy pasta recipe!  We have been making it for a few years now and it is rare when we purchase the packaged noodles at the local store.  Here are the step by step instructions for you to impress your guests with at your next dinner party.  You will need a pasta maker ... but years ago I remember making pasta and hanging it on wax paper lined hangers to dry by hand.  Improvise! Most of all, enjoy the process of knowing you are making food with fresh ingredients for you, your family, and your friends!  

Fresh Pasta Dough

Fresh pasta dough is so easy to make, you'll wonder why you never did it before. If you can find Italian "00" flour, use it to make a very delicate, yet chewy pasta.  If not, all-purpose flour works really well.  

  • 2 1/2 cups all-purpose flour or "00" flour, plus more for dusting ((12 1/2 ounces))
  • 1 teaspoon kosher salt
  • 4 large eggs
  • 1 tablespoon extra-virgin olive oil
  1. To make dough:  Place flour and salt in a large mixing bowl and whisk to combine  make a "well" in the center of the flour mixture and add eggs and oil.  Using your fingers, blend the eggs into the flour mixture, stirring the flour in from the sides of the well and working outwards.  (We also use the kneading tool on our kitchen aid for this process to avoid messy hands.)  When the pasta dough is thoroughly mixed, turn it out on a lightly floured work surface.  Knead dough until it is smooth and flexible but not sticky, adding small amounts of flour as needed, about 5 minutes.  Gather the dough into a ball and flatten into a disk.  Cover with plastic wrap and allow to rest for at least 10 minutes or up to an hour at room temperature.

    To roll dough:  Secure a pasta machine to the edge of a long counter top.  Using a bench scraper, cut the dough into thirds.  Keep extra dough covered in plastic wrap while working with one piece.  Flatten the piece of dough into a rough rectangle so that it will fit inside the width of the pasta machine.  Place the rollers on the widest setting and roll the dough through the machine, catching it with one hand as you roll with the other.  Take the dough and fold into thirds towards the center of the dough.  Turn the dough so one open end faces the machine and roll it through on the widest setting again.  Fold, turn, and roll once more on the widest setting.  Continue rolling the pasta through the machine without folding, adjusting the rollers to the next smallest setting each time, until the desired thickness is reached.  If the pasta sheet becomes too large to handle, use a bench scraper (or a large knife)  to cut it into more manageable lengths and continue rolling.  

    Cut the sheets to desired shapes and sizes, toss with flour and set aside covered with a clean kitchen towel.  The pasta can be cooked immediately or covered with plastic wrap and refrigerated for up to an hour before use.

    To cook pasta: Heat a large pot of water over high heat until boiling.  Add enough kosher salt to season the water like sea water.  Add pasta and stir immediately to prevent the strands from sticking together.  Boil until al dente, 2 to 3 minutes.  Reserve about 1 cup pasta water and drain pasta through a colander.

    Toss hot pasta with your choice of sauce, using the reserved pasta water to thin the mixture as needed.  Garnish as desired and serve immediately. 


3 Types of Salt You Should Have in Your Pantry

 by Eat

Does it really matter which type of salt you use when the sheer variety available is as wide as the sea? The short answer is yes, it does. Read on to find out why.

types of salt-HelloFresh-sea-kosher-table

Season with salt and pepper. If you’ve ever cooked a HelloFresh meal, you’re probably familiar with this phrase. You’ll find it in every single one of our recipes—sometimes three, four, or five times. With so much seasoning going on, you’d think that our chefs are hooked up to a dispenser that shoots out salt and pepper at the flick of a wrist (they’re not, although that would be pretty cool).

Seasoning may seem like an afterthought compared to the (often literal) meat and potatoes of a meal. But it’s really the simplest and most fundamental way in which you can develop flavors. A pinch of salt and pepper here and there can mean the difference between food that’s bland and food that makes your taste buds sing and dance.

This is hardly groundbreaking advice. But if you’ve taken a trip down a grocery aisle lately, you’ve probably noticed that there are more types of salt than any collection of shakers could hold. You’ve got everything from your classic fine white table variety to craggy pink nuggets that look like they belong in a rare gem display. How’s a happy home cook to choose when the options are enough to induce a seasoning anxiety disorder?

types of salt-HelloFresh-sea-kosher-table

Before you throw your hands up and pick the first container within reach, let’s establish that it does matter what salt you use when cooking and how you use it. If that has you scrambling to check your cabinet, fret not. There’s a time and place for every type. You’ve just got to know when and how to use each in a way that’s, well, worth its salt. (As for salt’s best friend pepper, we’ll visit him another day.)

What is salt?

Salt is the thing that makes foods salty, of course. But it’s also a mineral, an essential nutrient, and what happens when a sodium and a chlorine ion join together. That’s true of any type of salt, whether it’s in a fancy jar or in a paper packet from your neighborhood fast food joint.

If all salt is made from the same stuff, then why does it matter which kind I use?

Sure, at its most basic, salt is little more than good ol’ NaCl, regardless of how gussied up it is. But because different types of salt have different crystal structures, they each lend themselves to different uses.

Let’s back up a step and understand how those structural differences occur. There are two major sources of salt: sea water and inland salt deposits, from which salt is extracted by dissolving it in water. To turn either into edible salt, the water must be evaporated off. If this evaporation occurs rapidly, you’ll get very fine, uniform particles, like table salt. If it’s done slowly, coarse, flaky, and irregular shapes will form, like they do in many fancy sea salts.

types of salt-HelloFresh-sea-kosher-table

The size and shape of salt crystals matters because it affects how much salt will fit in a given amount of space. If you measure out a teaspoon of fine table salt, all of the grains will fit pretty snugly with very little space between each. Do the same with a coarse sea salt and they’ll lie on top of each other like crumpled pieces of paper, unevenly distributed with lots of gaps in between. Thus, a teaspoon of table salt is actually saltier than a teaspoon of coarse sea salt because more of it fits in the same amount of space,

Some recipes will recommend a specific type and amount of salt to use to help guide you toward a certain level of saltiness. But others (including HelloFresh recipes) leave it up to you to season as you like. This is not just to make the recipe open-ended enough to accommodate any cook’s pantry. It’s also because everyone’s taste for the stuff is different. Factors like genetics, past experience, and even age can affect how you perceive it. Which is why there’s no one size fits all approach to seasoning—it’s personal.

But even if salt preferences are as unique to each person as their fingerprints, there are still a few rules you can follow that will help you use it wisely. Here’s a breakdown of the differences between table, kosher, and sea salt—the three basic types used for cooking—and when and where it’s best to break out each.

1. Kosher Salt

types of salt-HelloFresh-kosher-salt

What it looks like: Coarse, medium-sized particles.

How to use it: Kosher salt is great for seasoning before, during, and after cooking. It’s preferred by many chefs as an all-purpose salt because its rough texture is easy to grip with the fingers, making it easier to control and dispense. The size of kosher salt crystals varies by brand, however, so it’s still a good idea to taste as you season, even when a recipe tells you how much of it to use. Kosher salt gets its name from the act of koshering, or removing impurities from meat after butchering according to Jewish dietary practice, thus it is perceived as having a cleaner taste and fewer additives (although, again, this can vary).

Where to use it: Classic Meatloaf à la Mom is the perfect place for practicing your seasoning skills at every stage, especially with kosher salt.

2. Table Salt

types of salt-HelloFresh-table-salt

What it looks like: Very fine, powdery, evenly-sized crystals.

How to use it: Table salt’s small, evenly-sized crystals are best suited for when you need to be precise in the amount of salt you’re measuring, particularly when baking. It also works just fine during cooking—since it dissolves easily, it blends right in to just about anything. And there’s certainly nothing stopping you from using it to season the food on your plate (it is called table salt, after all). It’s just that coarser salts are preferred by some for this task because they’re easier to control and bring some textural benefits.

If you’re going to use it, keep in mind that it’s easy to over-salt with table salt. Table salt is roughly twice as salty as the same volume of kosher salt (so measure out half if using the former in place of the latter). It’s also worth noting that table salt is sometimes iodized (fortified with potassium iodide, a dietary supplement), or treated with anticaking additives, which can create bitter or off flavors.

Where to use it:  Lemon Ricotta Pancakes call for precise measuring to ensure that they’re perfectly light and fluffy, which is why you should break out the table salt when making them.

3. Sea Salt

types of salt-HelloFresh-sea-salt

What it looks like: Depending on how it’s harvested, sea salt comes in everything from fine crystals to huge chunks in a rainbow of shades.

How to use it: Sea salts are best used for finishing and seasoning foods after cooking. Because they’re often flaky and coarse, it’s difficult to measure them out consistently and get a sense of how much saltiness they’ll add. But that irregular texture translates into small, tasty bursts of deliciousness that can enhance a dish when used as a finishing touch. Meats, salads, roasted veggies, and even desserts can benefit from a light sprinkling. Sea salts also sometimes contain trace amounts of minerals or other organic materials from the waters they’re sourced from, creating additional flavor complexities (although you’d have to be a pretty advanced supertaster to notice).

Where to use it: A dash of sea salt is just the accent needed to finish off the fries and steak. (bonus points for using a French sea salt in this bistro dish).

No matter which type of salt you’re using or what purpose it’s for, one rule always applies: keep it close as you’re cooking. If you remember to taste and season along the way, your food will be better, guaranteed.

For more wisdom on all things seasoning, check out:

Bay Lake Sunset Cocktail

Bay Lake Sunset Cocktail

We found this gem of a drink at the Bay Lake restaurant at the Contemporary Resort in Orlando.  Not only beautiful ... tasty too!

  • 4 oz coconut rum
  • 3 oz vodka
  • 4 oz pineapple juice
  • 2 dashes grenadine
  1. Combine rum, vodka and pineapple juice in a drink shaker. Shake firmly until frothy. Pour in a martini glass, add a touch of grenadine in the middle.

Scones

We could not wait to share our favorite scone recipe with you after enjoying tea at the Waldorf in London!

Hurricane Irma's Stress-Beater Smoothie

After wreaking havoc in the Caribbean ... Hurricane Irma is hurtling towards South Florida, and the threat of catastrophic damage is forcing residents and businesses to grapple with finding a balance between self-preservation and maintaining order.  There were several cases of tensions boiling over as Floridians scrambled to secure emergency supplies and evacuate their towns. 
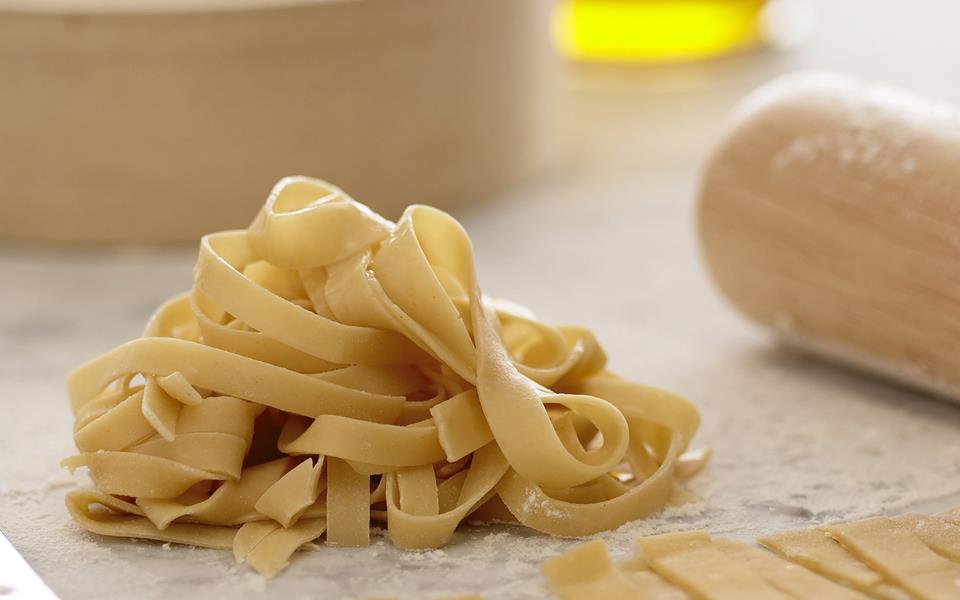
picture provided by Sun Basket, August 2017

We thought it would be a good idea to share nutritionist Lindsey Kane and recipe developer Paul Conte's Stress-Beater smoothie recipe.  As a bonus there are three additional nutrient-packed and colorful smoothies for you to try.   Whether you’re facing a stress-filled morning or recovering from the night before, want to look your best or need an extra boost of energy before walking out the door, we have a drink to get your day moving in the right direction.

Start your day with a Stress-Beater Smoothie that will help you handle whatever the universe throws your way.

Stress-Beater Smoothie

Start your day with a smoothie that will help you handle whatever the universe throws your way. The combination of lime, avocado, banana, spinach, and coconut water delivers a heavy dose of stress-beating vitamin C, potassium, and magnesium to help manage blood pressure and will give you a boost of the feel-good neurotransmitter serotonin.

  • 1 lime
  • 1 cup coconut water
  • 1/2 ripe pitted avocado
  • 1/2 ripe peeled banana
  • small handful baby spinich
  1. Using a sharp knife, peel the lime; cut the lime in half crosswise then coarsely chop the fruit. Discard any seeds.

    In a blender, combine the chopped lime with the coconut water, avocado, banana, and spinach. Season lightly with salt and blend until smooth.

    Pour the smoothie into a glass and serve.   Serves one.

This vitamin C and antioxidant-rich blend is hydrating and gives you a glow that lasts all day!

Glow-Getter Smoothie

This Vitamin C and antioxidant-rich blend of tropical fruits, fresh carrots, and the hydrating, good-for-you fats in tahini will give you a glow that lasts all day long.

  • 1/2 cup orange juice
  • 1/4 cup frozen chopped peeled pineapple
  • 1/4 cup frozen chopped peeled mangos
  • 1/4 cup shredded carrots
  • 1 Tbsp tahini
  1. In a blender, combine the orange juice, pineapple, mango, carrots, and tahini. Season lightly with salt and blend until smooth.

    Pour the smoothie into a glass and serve.   Serves one.

Trade your mocha latte for a Mojo Maker and get an energy boost from this delicious blend instead.

Mojo Maker Smoothie

Skip your mocha latte and get an energy boost from this delicious blend instead. A double dose of almonds—milk and butter—get you moving with magnesium and B vitamins. Antioxidant-packed blueberries are low on the glycemic scale, which means they’ll help prevent energy-sapping spikes in your blood sugar.

  • 1/2 cup almond milk
  • 1/2 ripe peeled banana
  • 1/2 cup frozen blueberries
  • 2 Tbsp almond butter
  1. In a blender, combine the almond milk, banana, blueberries, and almond butter. Season lightly with salt and blend until smooth.

    Pour the smoothie into a glass and serve.  Serves one.

Okay, you've overindulged the night before and need to hit your "restart button".  Try this mix of yogurt, coconut water, and strawberries!

Fresh Start Smoothie

When you’ve overindulged the night before, this mix of protein (yogurt), potassium (coconut water), and antioxidants (strawberries) will quickly get you back on track. 

  • 1/2 cup coconut water
  • 1/2 cup frozen strawberries
  • 1/4 cup 2% plain Greek yogurt
  • 2 tsp chia seeds
  • 2 tsp honey
  1. In a blender, combine the coconut water, strawberries, yogurt, chia seeds, and honey. Season lightly with salt and blend until smooth.

    Pour the smoothie into a glass and serve.  Serves one.


Spice Up Your Margarita!


Anejo Spicy Margarita

Bam!  This is a new way to experience a tasty margarita with friends and family.  Try this drink is nice with a fresh mango salsa and chips.

  • 1 1/2 oz anejo tequila
  • 1/4 oz Grand Marnier - orange liquor
  • 1/2 oz fresh lime juice
  • 1/4 oz simple syrup
  • 1/4 tsp chipotle chili powder (or your favorite chili powder)
  • 1 lime wedge
  • salt or sugar for rim

Simple Syrup

  • 2 1/2 cups sugar
  • 1 cup water
  • 1/2 lemon, juiced
  1. Pour all drink ingredients in an ice filled cocktail shaker (see simple syrup recipe, if needed).  If you like your rim salted or sugared, rub your lime on the edge of the glass and dip into the salt or sugar.  Shake vigorously and strain into ice filled glass.  Garnish with a lime wedge.  

Simple Syrup

  1. Combine all 3 ingredients in a 2-quart heavy-bottomed saucepan over medium-high heat and bring to a boil. All the sugar crystals should completely dissolve. Remove from the heat and pour into a clean medium-size bowl. Let cool completely before using. If you are short on time, you can cool the syrup over an ice bath. Simple syrup can be stored in the refrigerator, indefinitely, if kept in an airtight container.

Snook's Bayside Restaurant Toots Their Own Horn

This Key Largo restaurant is thriving after being totally destroyed by a disastrous fire in 2010. The new Snook's Bayside Restaurant and Grand Tiki Bar, in Key Largo, Florida, sits under a tiki and is the place to go for an Upper Keys sunset celebration. They are proud to offer a new design where every seat in the house has an unobstructed waterfront view. Every day they have a Sunset Horn Celebration. A rope is attached to an old boat and a randomly selected patron is given their signature rum drink in a hallowed out coconut, and they pull the rope to blow the horn, ushering in the sunset. Then the live music begins and the tiki torches are lit, dramatically transforming the entire place into a romantic island oasis. Snook's Bayside offers a "You Hook 'em, We Cook 'em" choice to their menu, where they use the freshest of ingredients. We highly recommend you check out their Snook's Stoli Blueberry Mojito, which is a great accompaniment to the Pistachio-Encrusted Yellowtail Snapper. We are sharing the chef's recipe to this snapper dish, served with sweet chili sauce. Bon Appetit!

Pistachio-Encrusted Yellowtail Snapper with Sweet Chili Sauce

  • 1/4 cup ground pistachio nuts
  • 1 7 oz yellowtail snapper fillet
  • 2 tbsp unsalted butter

Sweet Chili Sauce

  • 3 tbsp unsalted butter, divided
  • 1 tsp minced shallots
  • 3 oz heavy cream
  • salt & freshly ground pepper
  • 1 tsp Asian sweet chili sauce (bottled)
  • 1/4 cup cubed fresh mango (no larger than 1/2 inch)
  1. To prepare the yellowtail snapper:  Place ground pistachios on a large plate.  Dredge both sides of snapper fillet in nuts.  Melt 2 tablespoons butter in a large saute' pan and cook for 5 minutes.  Turn fillet and cook for 2-5 minutes  more, until fish is golden brown and flakes when tested with a fork.

  2. To make the sweet chili sauce:  Meanwhile, place a medium saute pan over medium heat for 2-3 minutes.  Add 2 tablespoons butter and shallots and saute until shallots are softened.  Add cream and reduce until it thickens somewhat.  Stir in 1 tablespoon butter and season with salt and pepper to taste.  Simmer for 5 minutes.  Stir in Asian sweet chili sauce.

  3. To plate and serve:  Place yellowtail snapper fillet in the center of  a dinner plate.  Top with mango cubes.  Pour sweet chili sauce over the mango-topped snapper and serve immediately.

A Vegan Chili with an Island Flair!

The flavors in this chili will explode in your mouth! Jerk seasoning has Rastafarian roots and is usually used on meats. This recipe includes protein rich quinoa. The mango salsa is a nice cool down for the spicy Jamaican seasoning.

Vegan Jamaican Jerk Chili with Mango Salsa

Make it leaner by omitting the oil and cook the onions and bell pepper in water instead.  You'll save 20 calories and 2.5 grams of fat per serving.

  • 2 red onions
  • 2 red bell peppers
  • 1/2 cup rainbow quinoa
  • 3 tbsp Jamaican jerk seasoning
  • 24 oz diced tomatoes
  • 1 ripe mango
  • 2 limes
  • 1/2 cup cilantro, chopped
  • 2 can white beans
  • 2 tsp fresh ginger, peeled and diced
  • kosher salt, ground pepper, olive oil
  1. Prep Onion, Bell Pepper, and Quinoa

    Peel and coarsely chop 1 1/2 of the red onions.  Dice the remainder and save for the salsa.  Remove the stems and ribs of the bell peppers and coarsely chop.  Rinse the quinoa.

    Start Cooking Chili

    In a large sauce pan over medium high heat, heat 1-2 teaspoons of oil until hot, but not smoking.  Add the onion and bell peppers, salt and pepper lightly, and cook for two minutes until soft.  Add the jerk seasoning and cook until fragrant, about one minute.  Add the quinoa, tomatoes, and 3 cups of water.  Bring to a boil and turn down to simmer and cook about 18-20 minutes until quinoa is cooked and chili begins to thicken.  While the chili is cooking begin the salsa.

    Make Mango Salsa

    Peel the mango and cut into 1/2 strips and cut the strips into 1/2 squares.  Mix the mango, diced onion, chopped cilantro.  Juice the limes into the bowl and season with salt and pepper.  Mix together.

    Finish the Chili

    Once the chili is done add rinsed beans and diced ginger to the sauce pan.  Mix together and heat until beans are warm.  Serve the chili in a bowl, topped with the mango salsa.

    Recipe and photo credit:  Sun Basket 

Authentic Pina Colada

img_2208.jpg

Ingredients

1 1/2 oz light rum

2 oz cream of coconut

2 oz pineapple juice

1 cup crushed ice

Directions

Coming all 4 ingredients in blender and mix until smooth. Serve in glass and garnish with pineapple and cherry.

For an extra kick, pour an additional shot of rum over a spoon onto the top of your drink. We like to add a coconut rum as our floater. Enjoy!

Perfect Eclipse Sandwich

In a few short days most of us will be finding the perfect viewing spot to watch the 2017 eclipse of the sun. If you are wanting something to tide you over while enjoying the show, we've come up with the perfect sandwich for you! Moon Over Myhammy! This moon shaped delight has been served at restaurants across the US for decades. It's easy to cook and will travel well if you're driving to the ideal viewing spot.

Can we suggest a Sunshine Wheat Beer by New Belgium to go with your Moon over Myhammy? Seems like a match made in heaven.

If you'd like to see how much of the eclipse you will be able to view in your area just click on this link and type in your zip code!

Moon over MyHammy

  • softened butter
  • 2 beaten eggs
  • 2 oz deli sliced ham
  • 1 bagel, sliced
  • 2 slices swiss cheese
  • 2 slices american cheese
  1. Put two medium size skillets over medium heat. In one skillet, add butter and scramble the two eggs. Salt & pepper the eggs to taste. In other skillet, brown the sliced deli ham, without separating the slices.

    Once the ham is brown, place the Swiss cheese on top of the ham and allow them to melt slightly.

    Toast the bagel slices and place the ham and Swiss cheese onto the bottom piece of toasted bagel.  Scoop the scrambled eggs out of the other pan with a large spatula and place on the ham.  Place the american cheese slices on top of the eggs and top the sandwich with the the other slice of bagel. 

    Pretty easy and darn tasty!  Happy eclipse day!


Chipotle Chilaquiles with Black Beans & Fried Eggs


Chipotle Chilaquiles with Black Beans & Fried Eggs

These chilaquiles may be the best thing that ever happened to tortilla chips!  Easy stove top dinner!

  • 1 Red onion
  • 2 Peeled fresh garlic
  • 1 Chipotle chili in adobo sauce
  • 1 1/2 cups Crushed tomatoes
  • 1 cup Cooked black beans
  • 3 Red radishes
  • 1 Avacado
  • 1 Lime
  • 1/4 cup Fresh cilantro
  • 2 Organic eggs
  • 4 tbsp Queso fresco
  • Tortilla chips
  • 1 tsp Yucatan spice blend
  1. Make tomato sauce - Peel and finely chop enough red onion to measure 1 cup.  Finely chop an additional 2 tablespoons onion for garnish.  Finely chop, press, or grate enough garlic to measure 1 teaspoon.  If using, coarsely chop the chipotle chile.  In a large frying pan over medium heat, warm 2 to 3 teaspoons oil until hot but not smoking.  Add the 1 cup onion, season with salt, and cook, stirring occasionally until softened, 5 to 7 minutes.  Raise the heat to med-high, stir in the garlic and the Yucatan spice blend (you can substitute with your favorite Mexican seasoning), and cook until fragrant, about 30 seconds.  Add the tomatoes, 1/2 cup water, and as much chipotle chile as you like and season lightly with salt.  Bring to a boil, reduce to a simmer, and cook, stirring occasionally, until the sauce thickens slightly, 8 to 10 minutes.  

    Prep the black beans and garnishes - Rinse the beans, trim the ends from the radishes; thinly slice, cut the avocado in half.  Remove the avocado pit, scoop out the flesh, and cut the flesh into bite-size pieces.  Cut half the lime into wedges.  Save the rest for another use.  Coarsely chop the cilantro.

    Fry the eggs - In a small frying pan over medium heat, warm 1 to 2 teaspoons oil until hot but not smoking.  Crack the eggs directly into the pan and season with salt and pepper.  Cook until the whites have set and the yolks are slightly runny.  2 to 3 minutes.  If you prefer firmer yolks, cook for 1 to 2 minutes longer.  Transfer to a plate.  While the eggs cook, finish the chilaquiles.

    Finish the chilaquiles - Stir the black beans into the tomato sauce and cook until heated through, 1 to 2 minutes.  Remove from the heat, season to taste with salt, and stir in about 2 cups of tortilla chips.

    Serve - Transfer the chilaquiles to individual bowls.  Garnish with the radishes, avocado, lime wedges, cilantro, and remaining 2 tablespoons onion.  Top with the eggs, crumble the queso fresco on top, and serve.

Quick Ratatouille and Gremolata

Ingredients (for two people)

  • Black bean spaghetti (or spaghetti of your choice)
  • 1 red onion
  • 1 zucchini
  • 1 1/2 cherry tomatoes
  • 1 lemon
  • 2 cloves peeled fresh garlic
  • 2 tablespoons Fresh flat-leaf parsley
  • 1/8 cup Walnuts
  • 1 teaspoon Red chili flakes (optional)
  • b cup Baby arugula
  • Kosher salt, pepper, olive oil

Prep & Cook

Cook the pasta for two (can easily double) in generously salted water.  Drain and transfer to a medium bowl; toss with 1 to 2 teaspoons oil.  While the water heats and the pasta cooks prepare the ratatouille.

Prep the ingredients and cook the ratatouille - Peel and thinly slice enough red onion to measure 1/2 coup.  Trim the ends from the zucchini; cut in half lengthwise, then crosswise on the diagonal into 1/4 inch thick slices.  Cut the cherry tomatoes in half.  In a large frying pan over medium-high heat, warm 1 to 2 tablespoons oil until hot but not smoking.  Add the onion, season with salt and pepper, and cook, stirring occasionally, until starting to soften, 2 to 3 minutes.  Add the zucchini and cook, stirring once or twice, until lightly browned, 2-3 minutes.  Add tomatoes and cook, stirring occasionally, until they start to release their juices, 2-3 minutes.  Season to taste with salt and pepper.  While the veggies cook, prepare the gremolata and walnuts.

Make the gremolata - Zest and juice the lemon, keeping the zest and juice separate.  Finely chop garlic.  Strip parsley leaves from the stems and coarsely chop.  Coarsely chop the walnuts for garnish.  In a small bowl, stir together the lemon zest, 2 tablespoons lemon juice, garlic, parsley, 1 to 2 tablespoons oil, and as many chili flakes as you like.  Season to taste with salt and pepper.

Finish the pasta - Add the cooked veggies and arugula to the bowl of spaghetti.

Serve - Transfer to bowl and top the walnuts and gremolata, sprinkle with any remaining chili flakes, if desired, and enjoy

Recipe and photo provided by Sun Basket Recipe Book; dated 8-14-17